Friday, 6 January 2012

Buttons, buttons


I would like to share with you all card I have made using my Georgina's Buttons & Stitching stamp set that I have designed for Little Claire.

I have used the set to create the background paper and also the frame round the greeting. I love to create my own patterned papers. It means I can use the colours I want and create the exact pattern I want.

To create my paper I started by stamping the button stamp all over a piece of white card using various coloured ink pads.


I stamped the buttons also onto Post-it notes. I cut out the button shape and covered up the stamped image on the white card. I then stamped more buttons onto the white card but over lapping an existing stamped image.


I continued this until I was happy with the pattern I had created.


I attached panels of my patterned paper to a scalloped card blank. I stamped the stitching to create a frame for the greeting on the front of the card. I stamped a button onto pink card. I used my Croc-o-dile to put holes through the button. I threaded pink thread though the holes before adding to the card.

Thursday, 5 January 2012

Georgina's Buttons and Stitching stamp set - my own designs!

It is with much excitement I would like to tell you all about a stamp set I have design for Little Claire. It's called Georgina's Buttons & Stitching. There are 10 stamps in the set.


The stitching makes a lovely finishing touch. The buttons can be stamped onto any paper/card etc, and coloured to co-ordinate with any craft project. This is a very versatile stamp set. I hope you think so too. For more details please see the Little Claire website or blog.

This is a card I have made using my stamp set. This is a great way to use up all those strip of paper we all keep 'just in case' we can make use of them.


I covered a square card blank with the strips of patterned paper. I then stamped the stitching along the edges. The buttons were stamped onto kraft card and punched the holes using my Croc-a-dile. I added a layer of Glossy Accents. Once they were dry I attached them to the card. To finish the card I added a tag stamped using Little Beauties - Tags Stamps also by Little Claire.

Blog Candy news: Over the next couple of days I will be showing you some cards I have made using my stamp set. On Sunday I will be offering one set of the stamps as blog candy. The candy will run for two weeks. Please do pop back and add you name to the list to be in with the change of winning a set.

Wednesday, 4 January 2012

At Home


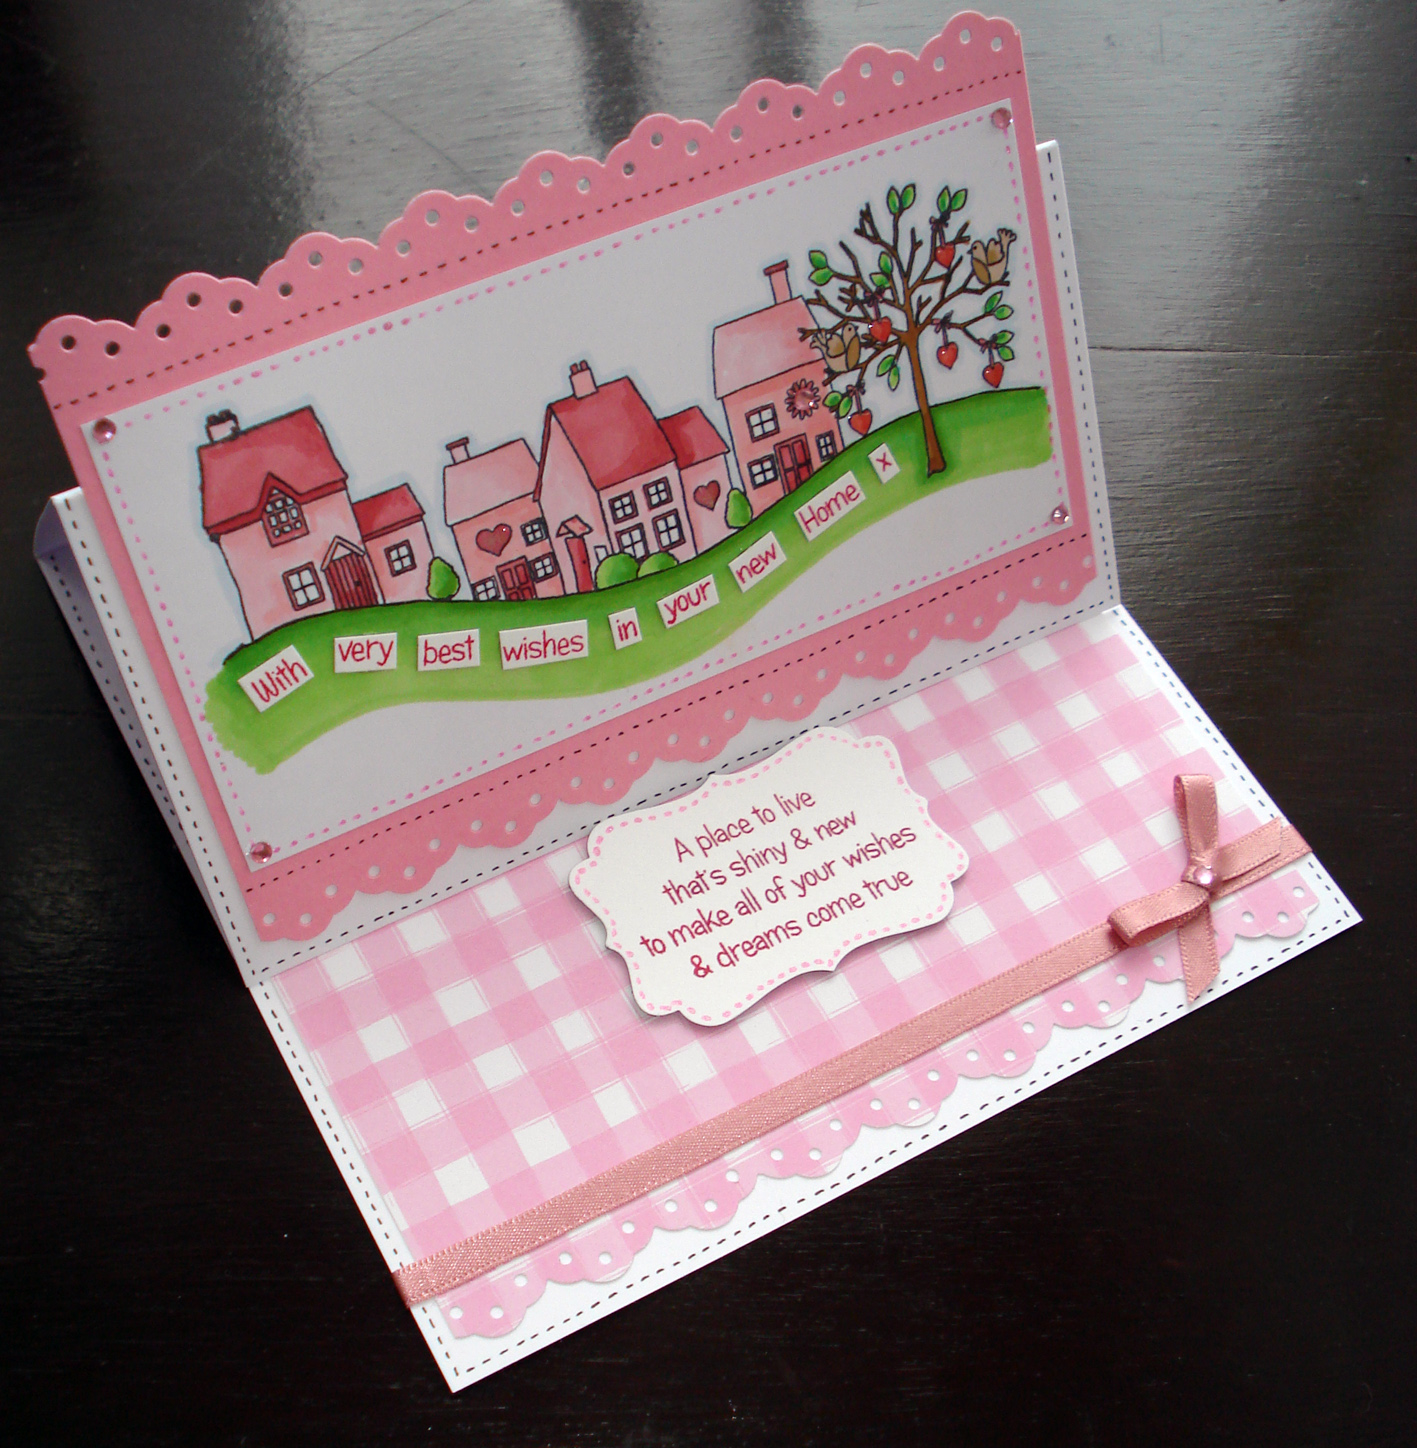
This is my second card using Little Claire January Stamp Club set, 'At Home'.

I begun by stamping the image with a black Memento ink pad onto smooth white card. I coloured in the image with ProMarkers. I added Glossy Accents to the hearts. I cut around the top edge of the image.


I cut a panel of dark blue card. Into this I cut a rectangle frame for the stamped image to sit. I attached the image behind the frame but I move the edge of the tree in front of the frame.

I stamped the greeting from the 'At Home' set in blue ink onto white card. I punched out the greeting using Stampin' Up Label punch. I attached a strip of blue ribbon across the blue panel before adding the greeting.


On a scalloped card blank I attached a panel of light blue card. Onto this I added the dark blue frame with foam pads. Around the edges I added white faux stitching with a gel pen and blue stitching around the edge. To finish I added a bow and buttons.

Monday, 2 January 2012

Little Claire January Stamp Club set

Happy New Year to you all! I have had a week off from blogging but I have still be working on card samples and other craft projects. I thought it was about time I got back to my blog and sharing some cards with you.


My card for today uses the lovely Little Claire January Stamp Club set. The set is called 'At Home'. The set includes the pretty houses image and sentiments. Instructions to make my card are included in the Club set.

Friday, 23 December 2011

Happy Christmas


This is my card for the Passion for ProMarkers - Mega Christmas challenge. The theme of the challenge is 'Celebrations'.

I begun by stamping the Humphreys Corner image with a black Memento ink pad. I coloured in the cute image with ProMarkers. I cut around the edge of the image. I covered a square card blank with dark blue card. Onto this I added torn strips of white paper to form snowdrifts. I attached the image onto the snow. I added PolarWhite FlowerSoft to the fur edge on the hats.



I scored a line 2cm from the fold on the back of the card I attached double sided tape to the 2cm panel. I attached the front to the double sided tape. I cut a square of white acetate for the overlay. Onto this I stamped the snowflake design with a white Staz-On ink pad. I added this to the card with red tape.



Using my Croc-o-dile I added two holes on the 2cm section. Through the hole I added red ribbon which I tied into a bow. To finish I added the greeting letters which were cut with my Cricut.

Thursday, 22 December 2011

Christmas George


This is my card for the Divas by Design blog challenge. The theme is 'Merry Christmas'.

The stamp I used for the card is Little George by Little Claire. I begun by stamping the image with a black Memento ink pad onto smooth white card. I coloured him in with ProMarkers. I punch the edge of the coloured panel and a panel of green card with my Stampin' Up Eyelet punch.


I covered a square card with gold card and holly patterned paper. I punch the edge of the holly paper. I attached a strip of red ribbon across the coloured panel before adding it to the card blank.


For the sentiment I used Red Gingham - Christmas Text stamps available from Little Claire. I cut this and the background circle out with Nestabilities Lacey Circles. To finish I added snowflakes which I cut with my Cricut and gems.

Wednesday, 21 December 2011

Glitter baubles


This is my card for this week's Speedy the Cat's Friends Challenge Week 86. The theme is Make a Christmas Card.

I begun by stamping the baubles. The stamp I used was from Stampin' Up 'Contempo Christmas' stamp set. I stamped the baubles with clear VersaMark ink pad. I then heat embossed them using various colours of WOW embossing powder. I punched out the shapes with my Stampin' Up Baubles punch.


On a square of white card I stamped the green swirls with a Pear Pizzazz green ink pad. I used a stamp from Stampin' Up 'Season of Joy' stamp set. I attached the punched baubles onto the white square. I cut a slit above each bauble and on the swirl. I threaded ribbon through the slits and attached behind the square. On a square card blank I added square of red and gold card as well as the bauble square.


I stamped the greeting and punched out the shape with a Decorative Labels Stamoin' Up punch. I added this to the card with foam pads. I stamped small red flowers using a stamp from the 'Season of Joy' set. I added these to the card and added gold Dimension Pearls to the centre. To finish I added ribbon bows and faux stitching.