Friday 29 November 2013

Bird Song and Owls

I have four Bird themed cards to share with you today. These were sample cards I made for Hobby Art's recent show on Create and Craft.
 
My first two cards uses the lovely Bird Song stamp set. For both cards I started by lightly distress the edge of the card blanks with Tumbled Glass and Stormy Sky Distress Ink pads. I then stamped the bird images with Tuxedo Black Memento ink pad. I made sure the ink was completely dry before colouring the bird images. The sentiment for the first card is included in the Bird Song stamp set.
 
 
I used various Distress inks to colour the bird images. This gave me a lovely watercolour effect. I stamped the ink pad directly onto an acrylic block and then added a little water. I then applied the ink to the card with a paintbrush. The sentiment for my second card, below, is from Hobby Art's Inspirations stamp set. To finish both the Bird Song cards I then added gold and clear Wink of Stella.

 
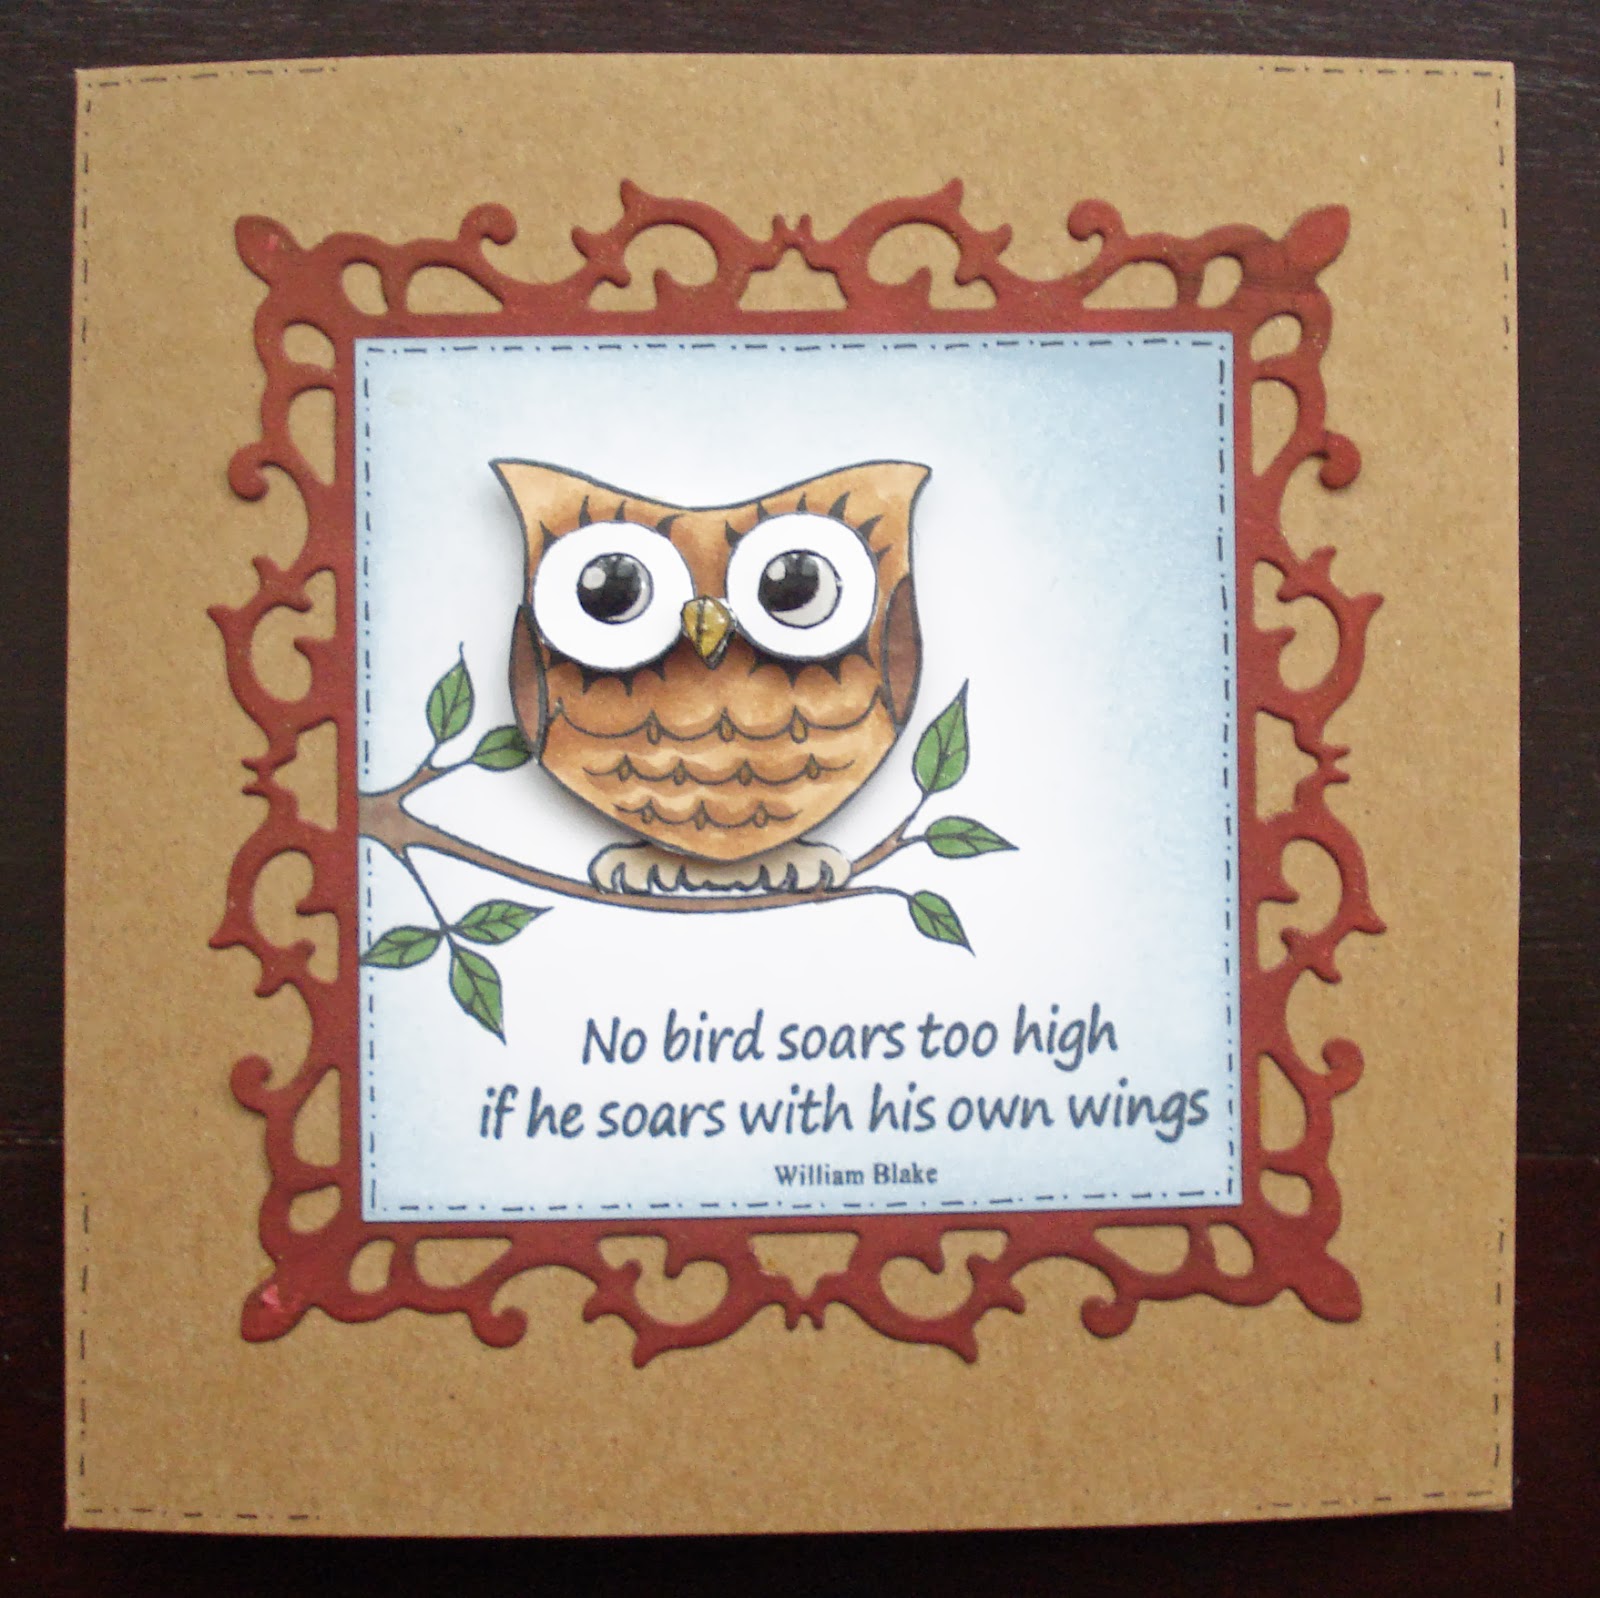
My second two cards for today use the cute Owls stamp set from Hobby Art. I used the Inspirations stamp set for the sentiments on both cards too.
 
For by first Owl card, I stamped the owl, branch and sentiment image onto a lightly Distressed blue square of card. I then stamped the Owl image three more times. I coloured all the stamped image with Copics. I cut out sections from the Owl image and added it to the square with foam pads. I then added the coloured image and a die cut square to a kraft card blank. The die I used for the square is Spellbinders Fleur de Lis. To finish I added faux stitching and Glossy Accents to the eyes and beak.

 
For the final card for today I used the Owl stamp set again.  I stamped the Owls, branches, sentiment and items hanging from the branches with a Tuxedo Black Memento ink pad. I coloured the images with Copics. I added the coloured image to a panel of dark brown card before attaching to the card blank. To finish I added Wink of Stella and Glossy Accents to the eyes.


Thursday 28 November 2013

A gift for you

A new card from me on Lisa B. Designs blog today. A little sneak peek...
 

Monday 25 November 2013

Christmas Tree

Today I have a selection of Christmas cards to share with you all make using prints from my Gelli Plate. My first card below I am also entering into this months blog challenge on The Artistic Stamper Creative Team blog. The theme is Christmas. For all my cards in this blog post I have use The Artistic Stamper's Modern Christmas #1 stamp set.
 
 
To make my cards I started my printing a selection of papers on my Gelli Plate. I used Paperartsy Fresco Finish paints in Claret, Yellow Submarine and Beach Hut. The green tree paint was a mixture of Yellow Submarine and Beach Hut. I applied the paint to the Gelli Plate with a brayer. I then stamped the tree and snowflakes into the Gelli Plate paint, making sure to clear the stamp between each print. I also printed one plain blue print with no stamps stamped into it.

 
I then cut out the tree, red tub and yellow star from the printed paper. I used the blue snowflake and plain blue prints for backgrounds. This is a close-up of my first card. The sentiment stamp I used is also from the Modern Christmas #1 stamp set. I added a square of blue snowflake paper to a scallop edge card blank. I then added the tree and stamped sentiment. To finish I added black dots around the edge of the square.

 
For my second card I used a strip of the plain blue paper printed paper. I stamped black snowflakes on the paper once I had attached it to the card (not using my Gelli Plate). I used a Tuxedo Black Memento ink pad to stamp on the card. The sentiment was from the Christmas Greeting stamp set.

 
For my third and forth card I used torn strips of white paper for snowdrifts. I used the sentiment stamp for just a sentiment and also a background. I cut a squares of snowflake print paper and then attached the snowdrift strips before adding to the card blanks. I again added black dots around the edges to create a frame.


Thursday 21 November 2013

Hoot it's Christmas!

It's Thursday so please do pop over to Lisa B. Designs blog for my regular Thursday post. This week, Hoot it's Christmas!

Wednesday 20 November 2013

It's party time!

It's Christmas party time at The Artistic Stamper! A crafty fun day of make 'n' takes, shop offers, mince pies, mulled wine and more. It's on Saturday 7th December from 9.30am - 5pm.

More details on the poster below. Hope you can make it.

Monday 18 November 2013

Festive Gelli Plate part two - Claret red

I was so pleased with my first Gelli Plate snowflake Christmas card prints that I just had to do some more. My first cards where in shades of blue and can be seen here on my blog. For my next prints I used Paperartsy Fresco Finish paint in Claret. I thought this colour would be ideal for Christmas.

 
Below are the four cards I printed. The photo above shows a close-up of the first card below. The card blanks I used are 148x148mm Scallop Edge white cards from Craftwork Cards.
 
I added the Claret paint to the Gelli Plate with a brayer. I then stamped the snowflake stamp directly into the paint. I used The Artistic Stamper's Snowflake and Modern Christmas #1 stamp set for the snowflakes. I left a blank space on the card to add the sentiment. The sentiment is from The Artistic Stamper's Christmas Greeting #1 stamp set.
 
On my first card I heat embossed the sentiment and additional snowflakes. I used WOW! Opaque White embossing powder for the embossing.
 
 
For my second card I used the Gelli Plate to print all the snowflakes. I used just one size of snowflake on this card. For both this and my first card I cleaned the snowflake stamps between 'stamps'. By doing this each snowflake print is clearer.
 
 
My third card below I heat embossed the small snowflakes around the edge. The larger snowflakes in the centre circle were stamped into the paint. As you can see the snowflakes aren't as clear as my previous two cards, this was because I didn't clean the snowflake stamps after every 'stamp'.
 

For my forth card I didn't add new paint from the bottle to the Gelli Plate, I just added the paint that was already on my brayer. This has meant the background red colour is lighter than the other cards. I just used the largest snowflake on this card. The sentiment was heat embossed again with WOW! embossing powder.

Saturday 16 November 2013

Little Claire blog challenge

A new monthly challenge starts today on Little Claire's blog. The theme of the challenge is Christmas. This is my DT card for the challenge.
 

I used Little Claire's Snowman Bunting stamp for my card. The sentiment is also included in the set. I used Distress inks to create the blue sky background. I added torn strips of paper for the snow drifts. I stamped the snowman with a Memento ink pad and coloured with ProMarkers and Copics. I cut him out and attached him to the card. To finish I added snowflakes and Stickles.

This month's prize for the blog challenge winner is


Dovecraft Christmas Tree Stamp
Little Claire Swirly Flowers Stamp
Little Claire Feed the Birds Stamp Set
36 Assorted Die Cut Sentiments
Assorted Christmas Greetings Sticker Sheet
5 12 x 12 Sheets Christmas Papers
 
For more details about the challenge or to enter, pop over to Little Claire's blog.

Thursday 14 November 2013

Eskimo Kisses

As it's Thurday it's my regular blog post on Lisa B. Design blog.

A little sneaky peek...

Monday 11 November 2013

Festive Gelli Plate

I have finally started to get on with making my Christmas cards. I made these cards with background I printed using my new Gelli Plate. I printed these following a recent workshop I went on run by Jennie at The Artistic Stamper.
 
I started by adding Paperartsy Fresco Finish paints onto the Gelli Plate with a brayer. I then stamped the Snowflakes stamp, from The Artistic Stamper, onto the paint. This left a snowflake pattern in the paint. I then pressed the card blanks onto the Gelli Plate to print the snowflake design on the card.
 
For the first card I used  Beach Hut and Inky Pool Fresco Finish Paints for the background print. Once the card was dry I stamped single snowflakes with a VersaMark ink pad. I then heat embossed them with Opaque Bright White WOW! embossing powder. The single snowflake stamps are from The Artistic Stamper's Modern Christmas #1 stamp set. On all the cards I added glitter to the snowflakes and sentiment for extra festive sparkle!
 

For the rest of the cards I just used Inky Pool Fresco Finish Paint for the background. For all the sentiments I stamped the sentiment onto paper I had coloured with Inky Pool paint. I then heat embossed them with the WOW! white embossing powder. The sentiment is from The Artistic Stamper's Christmas Greeting #1 stamp set.


For my final two cards I also added die cut snowflakes. The blue snowflakes I coloured with the Inky Pool paint to co-ordinate with the card background.


Thursday 7 November 2013

Festive Swirls

New cards by me on Lisa B. Designs blog today. A little sneaky peek...

Wednesday 6 November 2013

Design Team news!

I am thrilled to be joining the Design Team for Craft Stamper for 2014. I am looking forward to working on new projects and challenges. So look out for my project next year in Craft Stamper magazine.

More details about the new Design Team are on the Craft Stamper Blog.

Tuesday 5 November 2013

A sketch for November

It's my turn for the blog post on Craftwork Cards blog today. A little sneaky peek of my cards...
 
 
Why not pop over to the blog for a closer look?

Saturday 2 November 2013

Swirlball Flowers

It's the start of a new month so it's time for a new Stamp Club set from Little Claire. This month's set is Swirlball Flowers. The set includes lovely image and sentiment stamps.
 
These are two card I made with the set.
 
For my first card I used the large rectangle flower and butterfly stamp. I stamped it four times onto a square of white card with a Memento ink pad. I coloured the image with Copics.  I mounted this onto a square card which I coloured tinted with Distress Ink. I stamped the sentiment onto a diecut circle of white card. I also stamped and cut out two single butterflies. To finish I added Stickles and blue Dimension Pearls.
 

For my second card I stamped the single flowerhead all over a card blank. Onto this I added a rectangle of pink card. I stamped the large flower image onto a rectangle of white card. I coloured this with Copics.


For more details about the Stamp Club and to see other DT samples then pop over to the Little Claire website.

Friday 1 November 2013

Christmas workshop

I finished my card designs for my next workshop last night. It's a mixture of modern and traditional looks. The workshop is at The Artistic Stamper near Faversham, Kent, is on Tuesday 12th November from 11am-1pm. For more details or to book call the shop on 01795 597757 or visit The Artistic Stamper website.